Quick Guide
This page covers all the aspects you need to know to use Chas Video Converter like a pro. It's quite easy, so no worries!
Content Table
Import a video
You can import video and audio files in the app using Drag&Drop or using the menu button (). This will create an instance of the file inside the application, so you can view information, assign a preset to it, proceed to conversion, etc. You can also import many files at once.

Convert it!
The fastest way to convert a video is choosing an "Output preset" (which is "MP4 file" by default) and clicking on the conversion button (). This button will turn into the stop button () and the progress bar will start running. When the conversion is finished you will find a new file in the same folder as the source, with the "_out" extension in its name. Use the folder button ( ) to access the path.

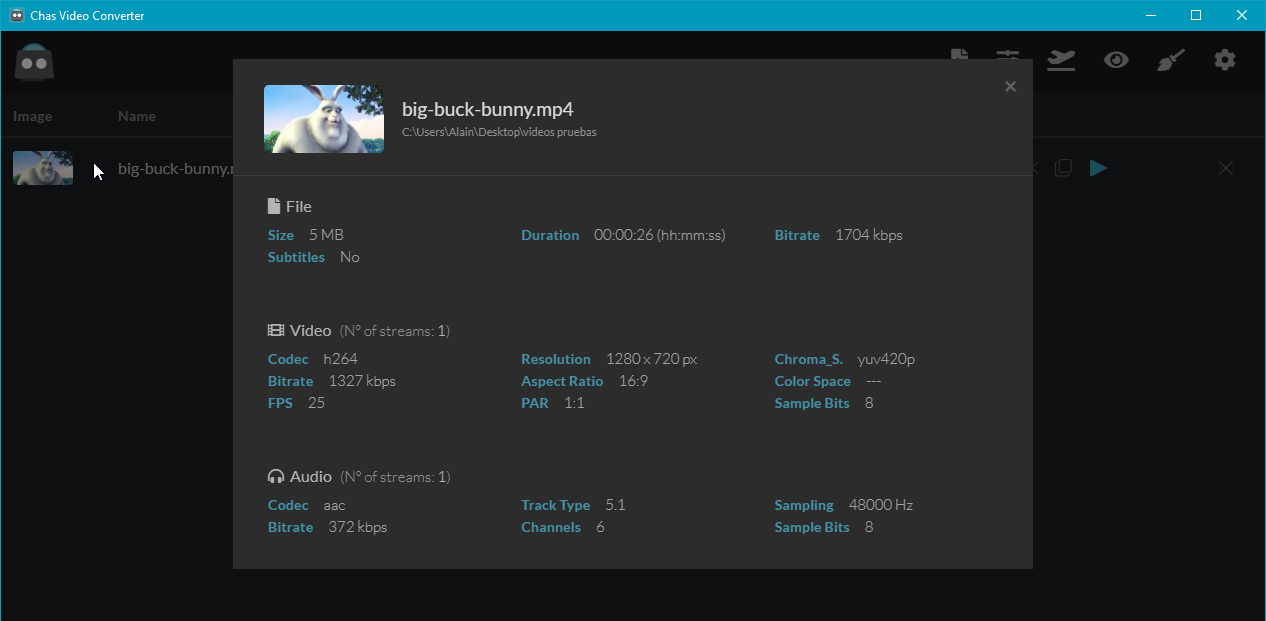
Analyze the file
By clicking in the media instance, a modal window will be shown; you can see relevant information here, like the duration, size, streams, frames per second, bitrate, codecs, etc.
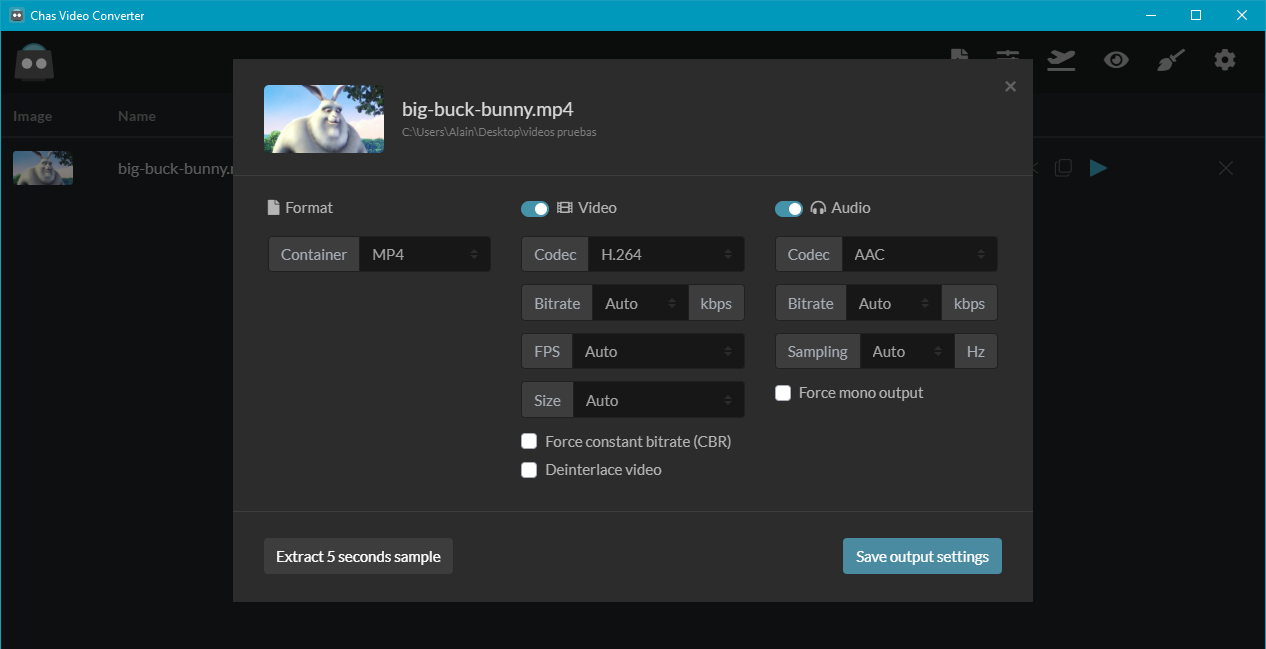
Set up the output
Use the settings button ( ) to access the output configuration panel, which allows you to modify many output parameters to match your ideal results. The "Extract 5 seconds sample" is a useful feature to test your output video before proceeding with the whole conversion (imaging waiting for 30 minutes to finish the conversion and then realize it is not valid... That's so annoying!). The quick extraction option will create a new file in the same path as the source, with the "_out_sample" extension.
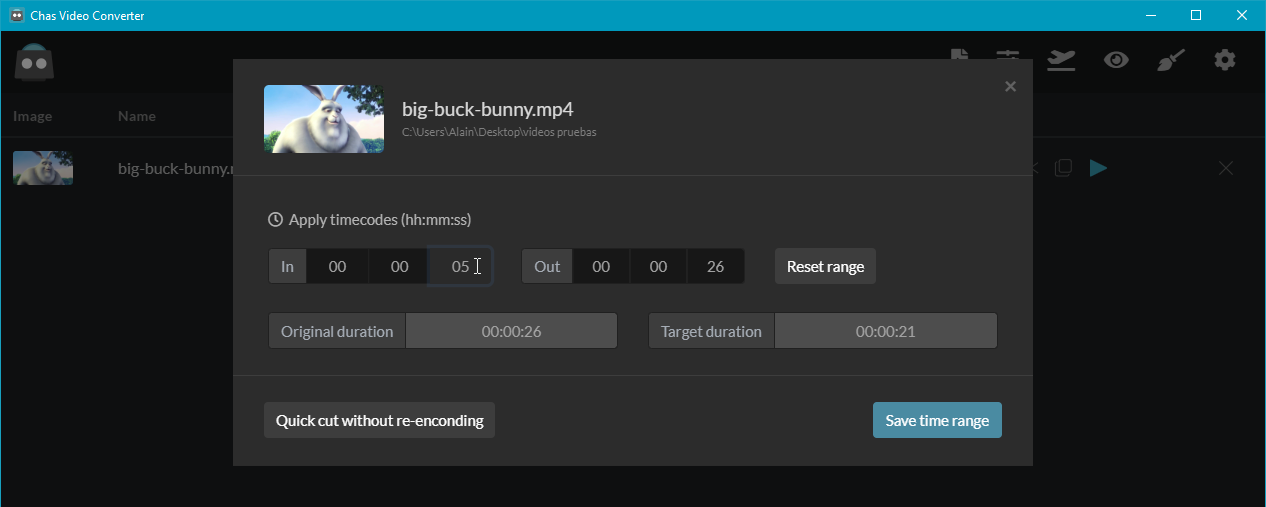
Cut video
Use the cut button ( ) to set input and output time points to your video. The "Quick cut without re-encoding" option is an extremely helpful feature if your only objective is to cut your file without losing quality! I really enjoyed this option when I had to cut 2 hour webinar videos in my last company, so I could do it in just few seconds. The quick cut option will create a new file in the same path as the source, with the "_out_cut" extension.
Edit your own preset
Presets are the fastest way to apply output configurations to imported medias; you can use the system's default presets or create your own ones for specific needs. To access the preset editor panel use the "Preset Editor" button () in the main menu. You will have to start creating a new one because system's default presets cannot be edited.

Batch process videos
Use the "Batch Processor" button in the menu () to access a panel that allows you to apply a preset to all pending medias in the list; these video and audio files will be set in "waiting" state until they start converting. This is a good option if you want to convert a big list of files at once.

Watch folders
Some video workflows require to dinamically convert videos in certain folders. With this feature, accessible by the "Folder Watcher" button (), you select the folders you want to monitor so every video contained in them is automatically converted. You can set a different encoding preset for each folder watched. Besides, the activation switch allows you to start/stop monitoring each folder.
